Black opal mining
 This morning we studied Australia with our one-morning-a-week preschool friends. Aside from the anticipated "G'day, mate!" greetings, Kookaburra singing, and kangaroo races, we mined for black opals. Although it was mentioned, mining certainly wasn't a prevalent theme in our reading, which is one reason I thought it would be fun to try an activity related to it. You know, it can't be kangaroos for two hours.
Here's the lowdown.
Since I didn't want to send the kids home with a project that needed to be baked, and since I wanted them to have the mining experience, I created our "gems" at home prior to our meeting.
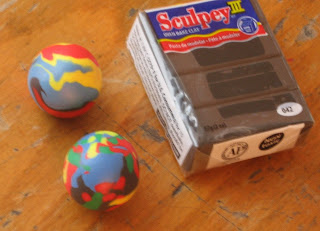
First, I rolled several balls (little bigger than rounded teaspoons, I think) of black or blue Sculpey. Then I pinched off tiny, thin pieces (odd rough-edged shapes, dots, snakes, etc.), of varying bright colors and pressed them to the balls.
Alternatively, you could sandwich your colors together. I used both methods. Next, I rolled the balls in the palm of my hands, adding more bits of Sculpey if I thought it was needed, and formed each ball into a unique shape, suitable to be worn as a pendant or bead on a necklace.
 I didn't want to bother drilling holes through the baked Sculpey, so I created holes, through which I could later string cord or ribbon, in each gem with a toothpick. Finally, I baked them in the oven at 275 degrees for about 20 minutes. (Follow Sculpey's box instructions if you do this at home).
That part of the project was relaxing and fun for me. I, sadly, don't have pictures of the kids' fun part, but here's what we did.
I filled a very large bowl with a mixture of soil, stones, and, since the soil came out of my friend's yard, some bits of weeds and a bonus worm. I tossed in a few of our black opals. The kids took turns sifting through the mixture with toy trowels, garden forks, and sieves.
After unearthing all the opals, we set them in our little beach sieve and took turns washing them in the sink. Each child chose their opal to "polish" with a washcloth or paper towel. Lastly, we strung our gems on ribbon and proudly wore them around our necks.
The kids really enjoyed this activity and, of course, the pretty take-home prize.


